
![]()


![]()


,
![]()

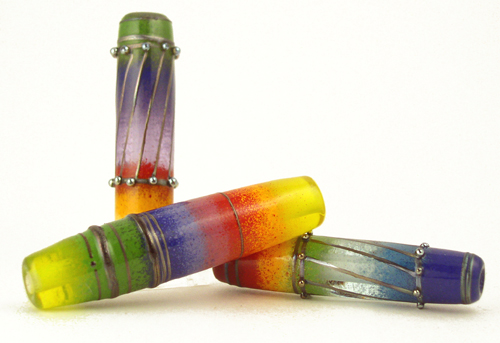
Straight-line stringer tutorials for your pleasure!
(Donations appreciated)
(Jessica Herrell or jc@jcherrell.com)
Practice Is... Finding your home in the zone Your grip
Practice is...
1. Practice is mental. Practice
starts with the decision to learn and improve
your skills. Without this decision it is
easy to become frustrated and walk away.
Once the decision
is made
your mental awareness of the causes and effects
of viscosity and heat become exciting, as well
as how your actions affect the outcome.
You also will find
yourself remembering important details and
reflecting on what did and didn't work.
Intention, awareness and reflection are
important mental skill builders.
2. Practice is physical. Accurately performing a task over and over creates valuable muscle memory. Once your body knows what to do and gets good at doing it, your mind is free to think about other things, such as design, more skill development and variations on the skill.
3. Practice is practical! Not only are you learning a skill but, you're producing products as a result of your practice. Practice is a double scoop of awesomeness when you consider the skills you learn and the inventory you'll create. Best of all, the more you work at the torch the more you'll have of both!
4. Practice is emotional.
It's unlikely that anyone will create
"perfect" lines right from the start. The
struggle can sometimes be discouraging, creating a wall
that divides those that gain confidence and
those who don't. You can either spend time
navigating to the other side of the wall or you
can stare at it, being mad at its existence. I
encourage you to keep climbing that wall until
you get to the top, straddle and ride it (scream
"WAAHOOOO!" a few times) and then
enthusiastically, confidently leap to the other
side.
Finding your home in the zone
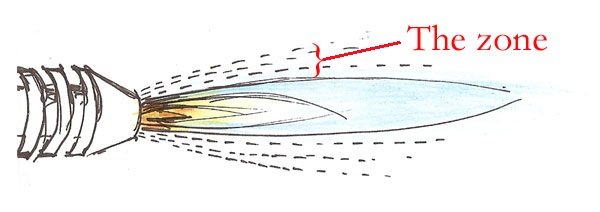
What is the zone?
It is an area of heat, right next to the visible
flame, where the temperature is great enough to
soften a stringer but not hot enough to heat the
glass to liquefy the glass causing the stringer
to ball-up
and become uncontrollable. Once you get
the hang of it, you might even find that the zone
can be a pretty big place.
Just about any flame can be a stringer flame, some
are just easier than others. Every flame
size has a zone of heat outside the visible
flame that's ideal for stringer application.
Adjusting the size and temperature of the flame
also adjusts the size and temperature of the
zone around the flame. A large flame has a
large zone of "stringer heat" but also moves and
wafts with airflow so it is a very challenging
flame for precision placement, in particular for
thin stringer. A small neutral flame is
ideal for most stringer applications. This
picture gives you an idea of the size flame I
typically like to use.
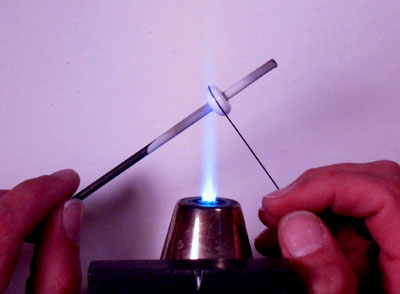
Here's how to find the zone.
Put the tip of the stringer on your hot bead
next to the flame. Apply very gentle
pressure with the tip of the stringer. Maintain this
relationship between bead and stringer while
slowly approaching the flame. As you enter
the zone you will feel the stringer give as it
softens enough to move under your pressure.
You have entered the zone. Now it's time
to start rotating the bead and laying the
stringer.
Your home in the zone depends on two things:
your comfort level and the stringer size.
The smaller the stringer the less heat is needed
before the stringer softens and/or becomes molten.
A hair thin stringer will barely need to enter
the zone to be worked (in fact, base heat from
the bead can provide most or even all of the
heat needed to work the thinnest of stringers).
A thick stringer needs either more heat or more
time in a cooler part of the zone.
Your grip
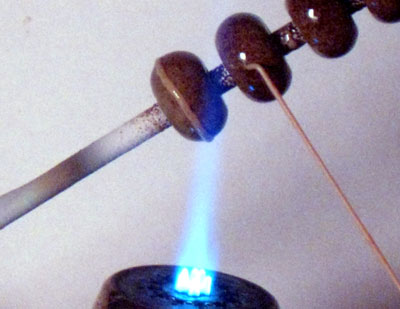
There are many ways to hold a stringer. With experience you will naturally find the most comfortable one(s) for you. My grip choice depends on the size of the stringer and the application. I encourage you to experiment with your grip and find something natural and comfortable for you. Here are a few examples of my frequently used grips, starting with grips for larger stringers:
I like this grip for drawing rings and other
lines perpendicular to the mandrel. The
stringer rests on the top of my index finger
while my thumb can feed the stringer or rotate
it. I can loosen the tension on the
stringer allowing it to be pulled through my
fingers but can also easily gain firm control.
This is not a gentle grip; it does not work well
for thin stringers.
I like this grip for horizontal lines. The
stringer rests on the inside of the middle
finger while the thumb applies pressure.
Both the thumb and the finger can feed the
stringer onto the bead. This is also
a great grip for dragging a line. The grip
works well for both thick and thin stringers.
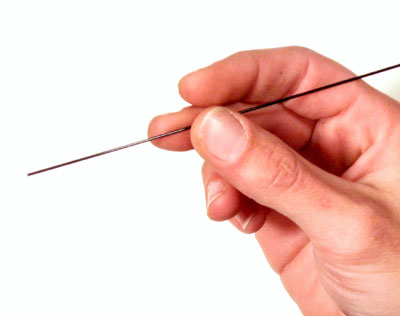
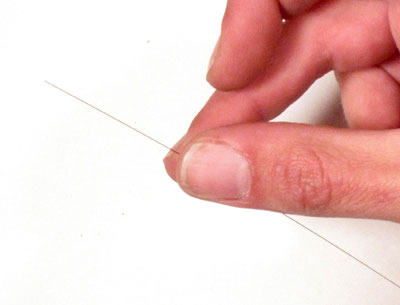
I like this grip for drawing diagonal line, and
sometimes for horizontal lines. The
stringer is held between the thumb and index
finger with as little or as much pressure as
needed. I can rotate my whole hand or my
fingers for a wide variety of ways to apply
tension (handy for starting and stopping lines).
This grip also works well for thin stringers,
but be careful not to apply too much pressure or
the stringer will break between your fingers.
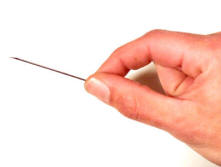
I use this grip to make touch-ups and use the
last bits of stringer. It won't work with
long stringer, but it works well for both thin
and thick stringer.
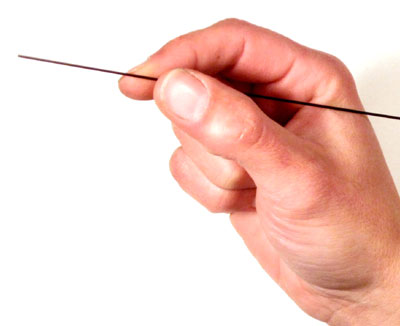
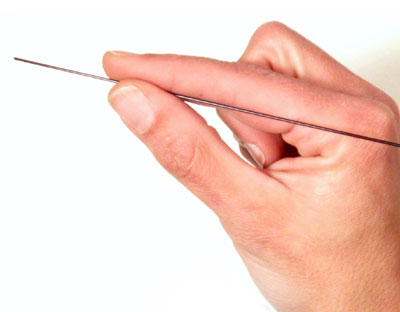
I use this grip to draw rings or other lines
perpendicular with thin stringer. The
stringer is held between my middle and index
finger, thumb at the ready. I only use this grip
to hold very thin stringers.
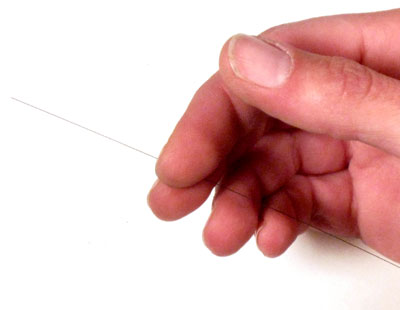
I use this grip to draw horizontal or diagonal
lines with thin stringer. I also often use
the same grip with the stringer resting above
the thumb instead of below, as shown in this
picture. I only use this grip on thin
stringers.
Did you find this information helpful? Will it enhance your work? Any donation is appreciated!
Questions or comments? Let me know so I can make these tutorials even more user friendly!
The
Joy of Stringer Menu
www.jcherrell.com
Purchase work